If you want to use UserControls in SharePoint web parts you can use SmartPart (http://www.codeplex.com/smartpart). But you can also build a web part that load a UserControl yourself.
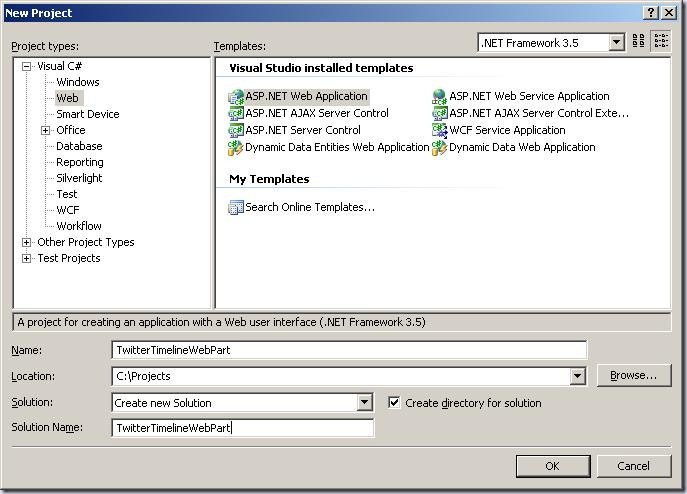
If you want to do it yourself you start out by opening Visual Studio (whether you use 2005 or 2008 doesn't matter). Next you create a new project of the type "ASP.NET Web Application".
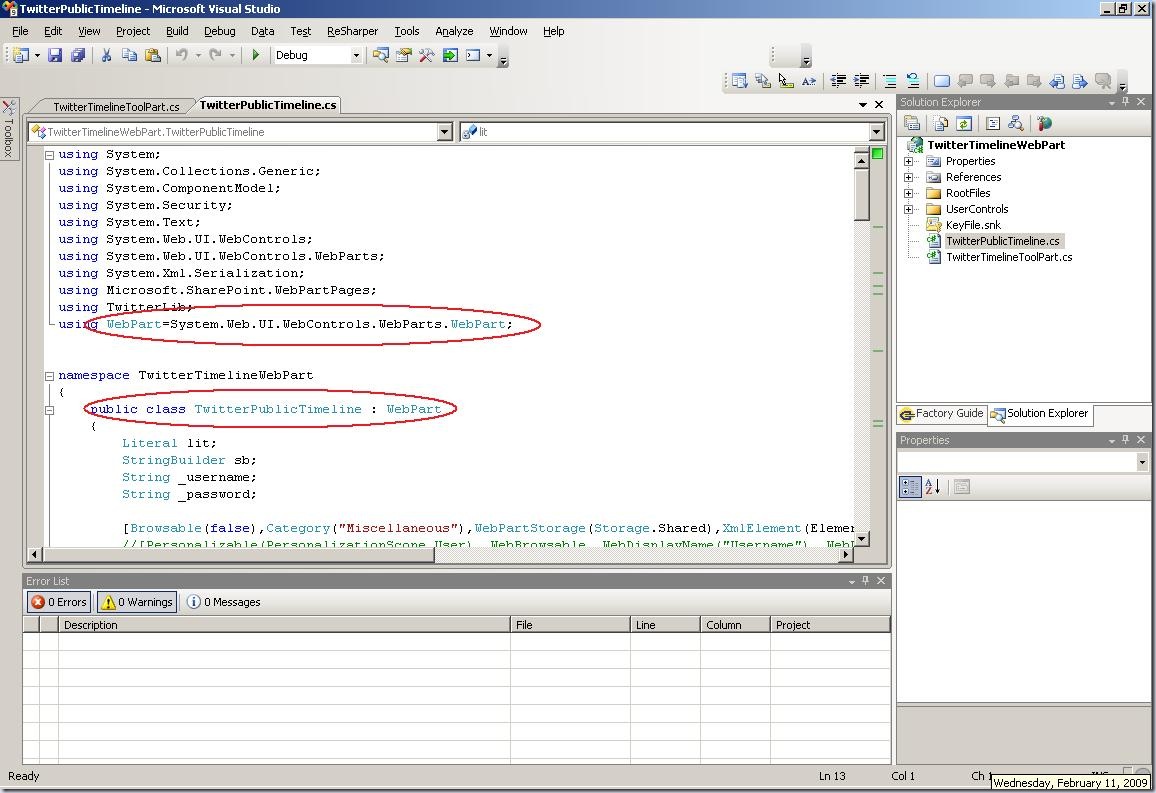
Then you can add a new class to the project and you make sure that it inherits from System.Web.UI.WebControls.WebParts.WebPart.
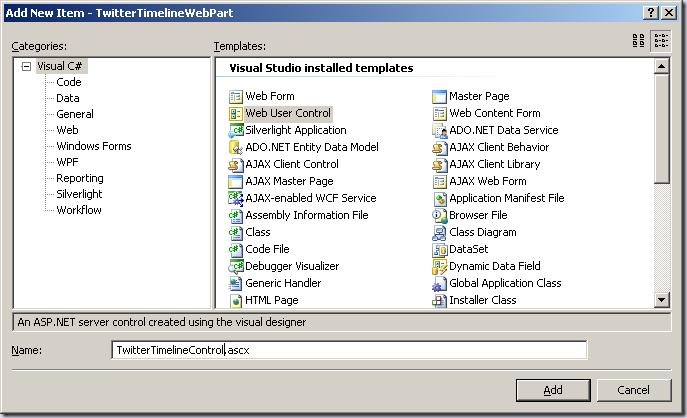
Now create an new folder in the project that you call "Usercontrols" and add a Web User Control to it.
Make sure that you adjust the Inheritance of your .ascx file to a fully qualified name.

Let's go back to the class you created initially and add the user control to it. You add the user control in the CreateChildControls function.

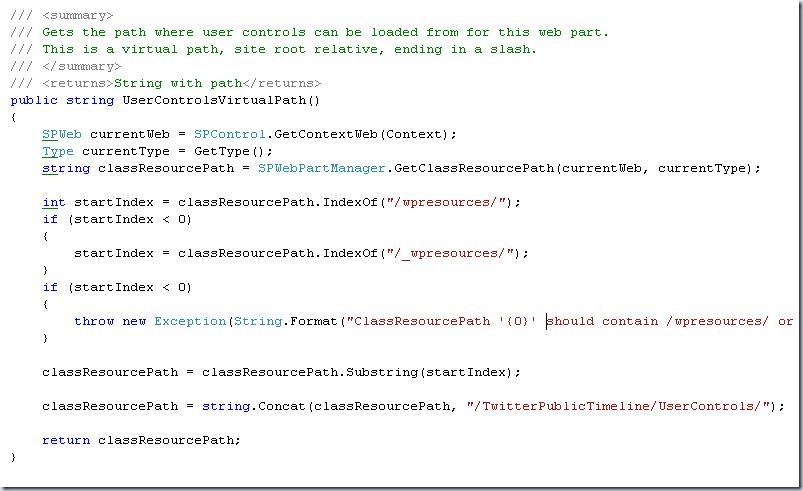
You can see that the function UserControlVirtualPath is called. This function is used to determine where the user control will be located. Reason for this is that the deployment location of the user control changes when you change the location where the assembly is deployed to.
If you deploy the assembly to the GAC the user control will be stored in the C:\Program Files\Common Files\Microsoft Shared\web server extensions\wpresources folder and will have the fully qualified name used to create sub folders. The user control for my project will be stored in C:\Program Files\Common Files\Microsoft Shared\web server extensions\wpresources\TwitterTimelineWebPart\1.0.0.0__c038812e8af423a0\TwitterPublicTimeline\UserControls if I deploy the assembly to the GAC.
If I were to deploy the assembly to the bin of the web application the user control is deployed to the C:\Inetpub\wwwroot\wss\VirtualDirectories\moss2007dev\wpresources folder.
The UserControlVirtualPath function finds the location of the user control for you.
You can add all the content you like to the user control now. Nothing special about that.
One thing that we need to take care of that is SharePoint specific is the deployment.
I will do it manually, so everyone can copy this.
You start out be creating a .ddf file that will help you create the package. The .ddf file can be stored in the root folder of your project. I will call the file SolutionPackage.ddf. More information about creating the ddf file can be found here (http://msdn.microsoft.com/en-us/library/bb466225.aspx).
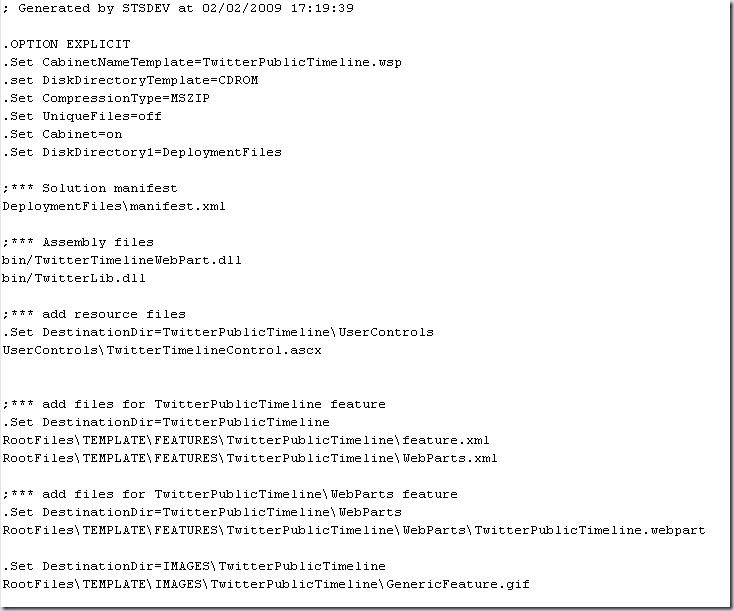
Next you need to create the manifest.xml file that will make sure that all files are deployed correctly. Create a folder "DeploymentFiles" and create a file that you call manifest.xml in it.
In the manifest you will have to create an Assemblies element with a child Assembly element in which you will specify the assembly you want to deploy. The property DeploymentTarget indicates whether the assembly will be deployed to the GAC or to the web application bin. If you want to deploy the assembly to the GAC the DeploymentTarget property needs to be GlobalAssemblyCache. If you would like to deploy to the bin of the web application you would use WebApplication.
The ClassResources element is a child element of the assembly element and will have a child element ClassResource. You will need to fill in the location of the resource file (the .ascx file) in the package in the FileName property. The Location property is used to indicate the folder that the resource file will be deployed to. In this case we will create a sub folder TwitterPublicTimeline with a sub folder
UserControls to store the user control in.
The Assembly element has another child element called SafeControls. The child element SafeControl is used to create the safecontrol entries in the web.config. You will need to add the information about your assembly in the Assembly, Namespace and TypeName properties. The Safe property should be set to True..that was the whole point right?
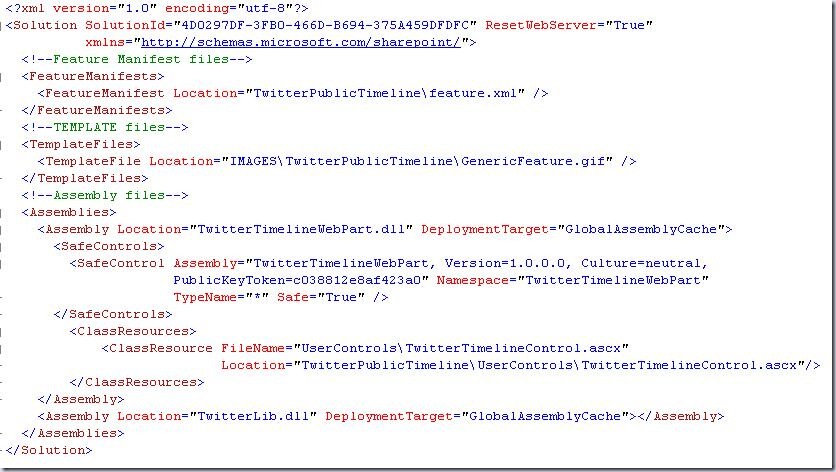
A great reference that describes the schema of the manifest file is located here (http://msdn.microsoft.com/en-us/library/ms442108.aspx).
After creating the ddf and the manifest files you start a command prompt and go to the folder where your ddf file is stored. You can then type "makecab /f SolutionPackage.ddf".
This will create the wsp package and include the files mentioned in the ddf file, including the manifest file.
If you want to check whether all files are actually in the package you copy the .wsp file and rename it to a .cab file. Then you extract it and check whether all files are in there.
Now you are ready to upload you .wsp file to your SharePoint environment. You can use the stsadm addsolution command for that.

After that you can go your Central Administration and deploy the solution to your web application. The Solution Management page can be found on the Operations page under the Global Configuration heading.
Click on the solution name and on the Deploy Solution link. Now select the web application you want to deploy the web part to and the time at which you want the deployment to run.
Your web part is now deployed. You will only need to add it to the web part gallery of your site collection be browsing to the site settings page of your site collection and select Web Parts under Galleries. Click New and select the dll of your web part. Scroll back to the top of the page and click the "Populate Gallery" button.
Congratulations! You can now add your web part to a web part page!